Sunday, March 13, 2011

Old Rice Hotel

The Old Rice Hotel is the pretty, old, building where Eli works so when I designed this scarf and hat set for him it seemed the natural choice for inspiration.

Here is a photo of the building I took last winter when we had an amazing ice-fog.  Every plant had a delicate silvered appearance that made the landscape seem like it was enchanted.
And here is Eli with his new cold weather gear.


The scarf is a knit and purl herringbone pattern knitted up in Cascade Rustic in color 04 which is a really nice wool/linen blend.  It's very soft with an interesting texture and a good drape.  A bonus is that it can be bound off at any time to use up every last bit of the yarn.  I hate having tiny little leftover balls. 

The hat is a sort of stranded knitting pattern with the contrast color woven in-between alternating blocks of the stitches.  I used Brown Sheep's Lanaloft Sports Weight in Sandstone Cove and Cliff Rock.  That the hat is mostly ribbing allows it to fit almost anyone.  It fit me (22" head) and Eli (24" head) which really encompasses almost everyone.  It has a really sophisticated appearance and it's a bonus to me that his Highness has been wearing it every day.

Buy The Old Rice Hotel Stocking Cap $5.00 

Buy The Old Rice Hotel Scarf 3.00 

Buy the Old Rice Hotel Set $6.50  

Saturday, February 5, 2011

Linocut Prints Part 2

The knitting related prints are coming along well and I have one plate carved, a lot of good ideas and some test prints accomplished.  I've had to order some ink as none of the stores around here had the Gamblin ink I wanted to use.  I prefer using ink from a tub instead of a tube because you can scrape unused ink back into the jar and since I'm not mixing colors right now it works out well economy wise.  I bought a small tube of Speedball oil-based ink from the store to play with until the tub o' ink arrives but I don't like it much.  It doesn't have good coverage and isn't tacky enough for my taste. 

I've purchased some mulberry paper to print on, a 8" roller, a scraper, a glass palette, a glass scraper, a Japanese brayer, a box of blue shop towels and some "green" mineral spirits that said it was low odor and good for indoor use.  All this stuff adds up!

Anyway here is a picture of my set up.  On the right are all my tools, the glass palette is taped down to my table over a piece of white paper so it doesn't move.  It's pretty easy to clean I've discovered.  I have an old 3" roller for small areas or applying spot color or stamping.  It's quite useful.


I've been really attracted to hands and the textures of knitting and textiles so I've been working on some compositions that include those elements.  I've always loved borders and usually put them on all my work.  I wanted something that was evocative of textiles or yarn and I was going through my pattern reference books and found something I liked in Ornamental Design by Claude Humbert.  The book is reprinted by Dover in black and white but I tracked down quite a reasonably priced original in the lovely orange, black and white that is at once both retro and stylish.  The border design I decided on is based on this one from the book.
Torc Motif.  Luristan, Persia 

I traced the plate I was going to carve in my notebook and measured out a border of an inch or so.  Then I freehand drew the outlined shape.

I added the interior lines when I was carving.  I only do as much work as I need to!  I traced it onto a piece of tracing paper (to the right in the photo above) so I could easily transfer the drawing to the linoleum plate.

I'll add at this point I wasn't sure what the rest of the composition was going to be.  I work on the fly!   I wanted hands but wasn't sure if they would be too difficult for my 5 years rusty skills.   Here is a sketch of my hands I did knitting.  I loved this image but it's pretty complex and I was worried I wasn't up to it.


So then I drew this crappy uninspired sketch of yarn balls with needles.  YAWN.


So I went back to hands and decided that this was both interesting and not too complex to carve. 
 I used the tracing paper to get some of the details of the hand, but I just drew the outline of the sock and added more details to the hand and made the fingers more proportional. I transferred the image to the plate and carved it out.  I did the border first as I knew just what to do with it and it was simple.  Then I carved out the hand, then the whole background.  Then I did the texture on the sock.  I was very nervous about it and how to go about suggesting a knitted texture.  I think it came out quite fine and I was rather pleased with it in the end.  You can see a little texture experiment in the drawing above.  I didn't do something that detailed however.  It wasn't going to work out.  


I did a couple of test prints and decided that while I liked it on the plate, in the print the un-carved out portion of the wrist made it look like a very hairy arm!  So on the fly I just carved that bit out.  It was much better but still needs a little refinement. You can see the two different versions in this photo

I'll be posting more about this when I get my good ink!  I'm pretty excited for it to come.  I'll be working on another plate in the meantime.  I think it'll likely be some hands knitting, but we'll see what I come up with.

Thursday, January 13, 2011

Knit related linocut prints

Why yes you did read that title correctly.  My knitting muse has flown for the moment so I figured I change tack for a week or two and work on making some prints.  They will be knitting related and I'll likely post some sketches when they come to me.  I'm feeling good about this, I've been wanting to do a little more drawing recently and I think some prints will do the trick.   If I write it here I'll have to do it because people will expect me to.  Yes yes.  A little peer pressure. 

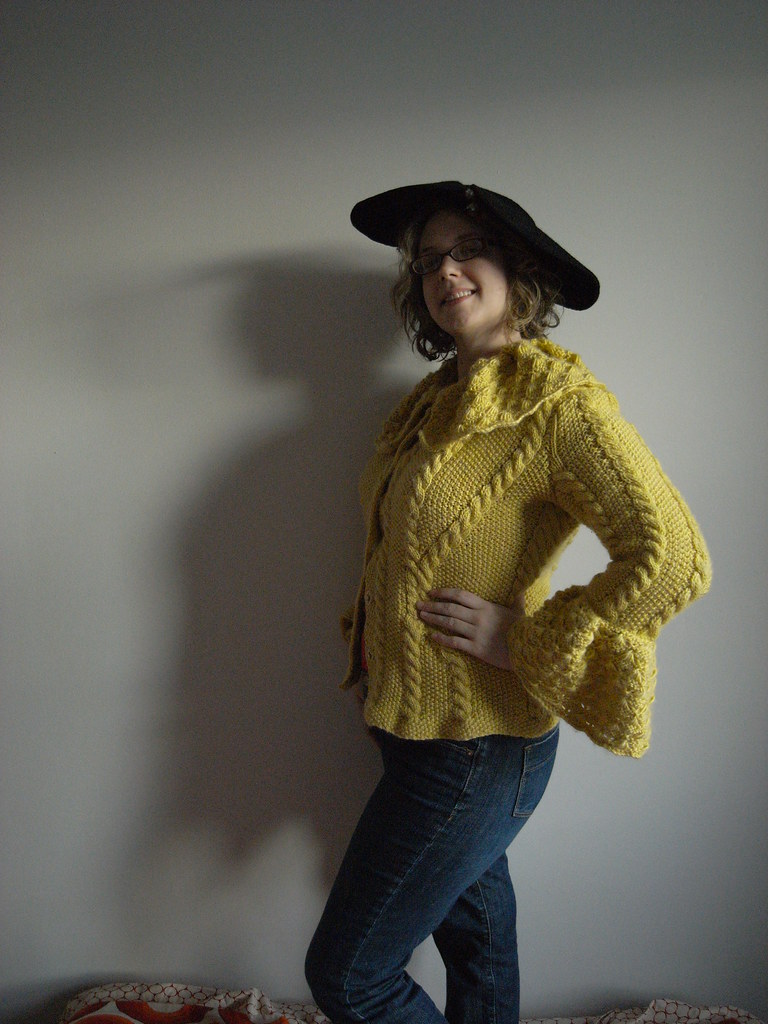
And since this post doesn't have a related photo have this one of a sweater I recently completed.  It's beautiful.  This sweater is knitted in an old cone yarn with no brand name that was ostensibly some sort of blend of wool and alpaca.  It's incredibly warm and I wore it as a coat down in the city for record shopping a couple of weeks ago. 

The pattern is Howlite, by Heather Dixon. 

Wednesday, January 12, 2011

Updates!

I just wanted to share that I've updated the patterns page with Meta Cap, a companion hat to Meta Mittens and Meta Set, which is both patterns together for a discounted price.

Another exciting thing that happened recently was that Meta Cap was mentioned in a podcast!  Just One More Row - podcast #3 - about 14 minutes in. That would be here - scroll down to episode 3.  It's in their "what's new in the queue" portion and though it's a small mention, I am extremely flattered to be noticed.

  Because this post otherwise has no photos and I can't have that, I'll leave you all with a photo from our Thanksgiving vacation to Edisto Island, South Carolina.

Wednesday, October 20, 2010

Beautiful Fall

Last Friday I went with Eli's family to Starved Rock State park for some hiking.  It was so, so beautiful there.  I thought I would share some of my favorite photos from the trip.


I had had a really great time.  That mushroom had been picked by someone and left by the side of the trail, Eli and I decided to goof around with it. 

Tuesday, October 12, 2010

New Everything!

Hello welcome to the new version of the blog!  I just got it live and linked up today and I'm really excited.  The new layout is prettier and more flexible and now I can have pages!  Like a I have a REAL webpage!  Oh boy!  I had an exciting time making up a logo yesterday which I'm going to put in this post so I can link it to facebook.  I have a lot of exciting patterns coming down the chute and look for class schedules and and about me pages coming whenever I can get over my loathing about talking about myself.  I hope everyone enjoys the new blog!  Now here's the logo I promised.


Friday, October 1, 2010

Susie's Long Stockings

The test knit for these socks finished on the 19th and it has been a looong ride. It started when I saw these socks in the Christian Dior Fall show by John Galliano.  I had to make something similar, I just loved them.

I bought the yarn way back in March and began swatching, which did not go smoothly.  I had an good idea of what I wanted the finished product to look like, I just didn't know how to get there.  I also had the idea that I wanted to do some of the shaping with needle size changes.  I wanted a lot of verticality like the Dior socks.  The Dior socks had faggoted rib obviously but I didn't think it would look the way I wanted at the gauge I was going to get out of sock yarn. I tried a lot of lace patterns that had vertical orientations but they all seemed too stretched out on larger needle sizes, I needed it to be polished looking, smooth and sophisticated.  After another failed swatch of star-mesh lace from one of the Barbara Walker Treasuries I sat stumped.  My knitting buddies liked it but it had too much air, and too much bias to be what I wanted.  The ribs on it looked too messy for my taste as well.  Then it hit me that a twisted rib might be my answer.  It pulls the rib in tight and attractive when stretched out and when you do the purl stitches plain it gives and orderly but slightly lacy look in between.  I made a few swatches and KNEW I had it.  I also had a pattern that had a sort of diamond orientation going up the side of the legs to get a similar look to the Dior socks. I chose the Vandyke Leaf Lace from the Second Barbara Walker Treasury.


I had to make charts for the beginning of the lace, the ending of the lace and the repeating portion. The difficulty was in writing the chart on a background of twisted rib.  I did accomplish it well though and I changed some of the clunkier looking portions of the Vandyke Leaf Lace so that the pattern flowed better to my taste.  I used Open Office's spreadsheet program and a knitting font I picked up on the internet.  I was also going to do these socks toe-up as it is usually my preference but the leaves on the Vandyke Leaf Lace looked weird going from the bottom up.  This probably worked out for the best as the back of the calf decreases I used look really stunning in the twisted rib.

I decided I would make 3 sizes so that almost anyone can make a wear these socks and I also made a video explaining the double decrease I invented so the the decreases stayed in pattern.


I decided that since there was going to be no way for these socks to stay up on their own I should make a hem for some elastic to be inserted.  I had seen a folded over hem done on a child's skirt so I just used the same idea, and in pattern.  It worked surprisingly well.   So I had all the elements I needed and I knit the first sock, and it looked wonderful!   I started the test knit after writing it out and doing a preliminary layout.  I stalled on the second sock.  I had terrible second sock syndrome.  I'd already done it, why wasn't I finished?  There were other things I wanted to knit!  Why did nature give me 2 legs?    But I eventually got around to it and took photos in wool thigh-highs when it was 90 degrees outside.  I'll tell you though, the sweat really held them in place!
I have to give kudos to my wonderful test knitters who found all the mistakes in my written version of the chart (boy writing that sucked) and various other problems with clarity and and suggested what photos would be most helpful to them.  This pattern wouldn't be nearly so great with out them.

Here is the relevant info if you are looking to make these socks:

Yarn : Trekking Pro Natura - 3 skeins
Needles : US 4, 3, 2, 1
3 sizes, s, m, l - Medium will fit almost everyone, small is for size 4 and lower and large is for size 16 and up.

It was really important to me to be inclusive with my sizing, I want as many people as can be to show off their awesome gams in my lovely socks.